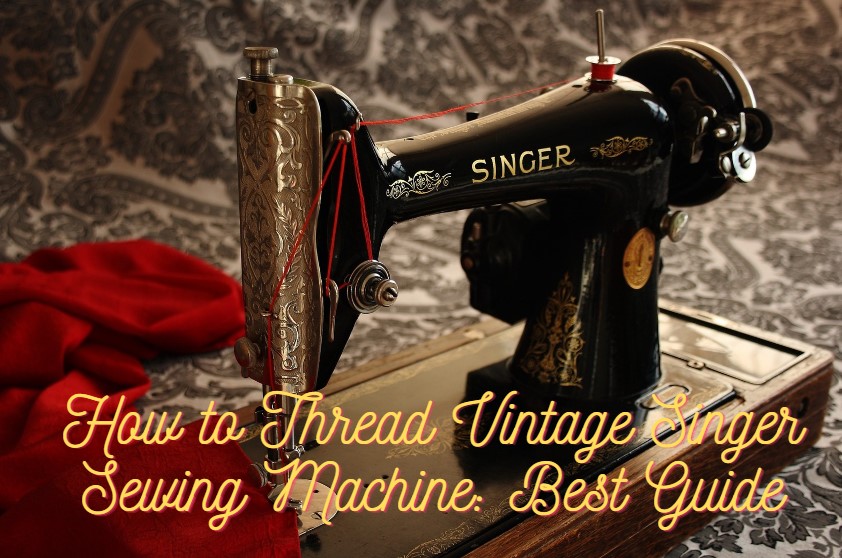
Threading a vintage Singer sewing machine might seem daunting, especially if you’re new to sewing or working with older machines. However, with the right guidance, it’s a simple and rewarding process. This step-by-step guide will show you how to thread vintage Singer sewing machine effectively, ensuring smooth stitching and optimal machine performance.

Contents
- 1 Understanding Your Vintage Singer Sewing Machine
- 2 Step 1: Gather Your Tools
- 3 Step 2: Wind the Bobbin
- 4 Step 3: Threading the Upper Thread
- 5 Step 4: Insert the Bobbin
- 6 Step 5: Draw Up the Bobbin Thread
- 7 Tips for Smooth Threading
- 8 Troubleshooting Common Issues
- 9 Final Thoughts
- 10 FAQs: How to Thread a Vintage Singer Sewing Machine
Understanding Your Vintage Singer Sewing Machine
Before diving into threading, it’s essential to familiarize yourself with the basic parts of a Singer sewing machine. While models vary, most vintage Singer machines have these key components:
- Spool Pin: Holds the thread spool.
- Thread Guide: Guides the thread from the spool to the tension disc.
- Tension Assembly: Controls the thread tension for balanced stitches.
- Take-Up Lever: Moves the thread up and down with the needle.
- Needle Clamp: Holds the needle securely.
- Bobbin Case: Houses the bobbin underneath the machine.
Step 1: Gather Your Tools
To thread your machine, you’ll need:
- A spool of thread (high-quality works best).

- A wound bobbin.
- A manual for your specific vintage Singer model (if available).
Step 2: Wind the Bobbin
Before threading the top part of your machine, ensure the bobbin is correctly wound. Here’s how:
- Place the thread spool on the spool pin.
- Pull the thread through the bobbin winder tension disc (usually near the top of the machine).
- Insert the thread into the empty bobbin and place the bobbin on the winder.
- Push the bobbin winder to engage it.
- Hold the thread tail and start the machine until the bobbin is evenly wound.
Step 3: Threading the Upper Thread
Follow these steps to thread the upper part of your Singer sewing machine:
- Place the Thread Spool
Mount the spool on the spool pin, ensuring it spins freely. - Pass Through the Thread Guide
Pull the thread through the first thread guide, which is typically located near the spool pin. - Engage the Tension Assembly
Bring the thread down and loop it into the tension discs. Make sure the thread slides between the discs securely. - Locate the Take-Up Lever
Pull the thread up to the take-up lever and pass it through the hole or hook in the lever. This step is crucial for maintaining proper thread tension during sewing. - Guide Through Additional Thread Guides
Continue threading through any remaining guides, usually along the faceplate or near the needle. - Thread the Needle
Finally, thread the needle from front to back. If your machine has a side-loading bobbin, thread the needle from left to right instead.
Step 4: Insert the Bobbin
Once the upper thread is ready, insert the bobbin:
- Open the bobbin case door under the needle area.
- Place the wound bobbin into the case, ensuring the thread pulls in the correct direction (usually counterclockwise).
- Pull the thread through the slot and under the tension spring in the bobbin case.
- Close the bobbin case and the door.
Step 5: Draw Up the Bobbin Thread
To complete the threading process:
- Hold the upper thread loosely with your left hand.
- Turn the handwheel toward you to lower the needle.
- As the needle comes back up, it will catch the bobbin thread and pull it through the needle plate.
- Pull both threads to the back of the machine and ensure they are free and not tangled.
Tips for Smooth Threading

- Refer to Your Manual: Vintage Singer models, such as the 201, 221 (Featherweight), and 66, may have unique threading paths. If you have the manual, follow its specific instructions.
- Keep Your Machine Clean: Dust and lint can affect thread tension and smoothness. Regularly clean your machine.
- Use Quality Thread: Cheap thread can cause knots and breaks. Opt for high-quality sewing thread.
- Practice Patience: Threading a vintage machine can take time, especially if it’s your first attempt.
Troubleshooting Common Issues
- Thread Keeps Breaking: Check for burrs on the needle or tension discs and ensure the thread path is correct.
- Skipped Stitches: Ensure the needle is installed correctly and not bent.
- Uneven Stitches: Adjust the tension settings or rethread the machine.
Final Thoughts
Learning how to thread a vintage Singer sewing machine is an essential skill for anyone using these classic sewing tools. With patience and practice, threading your machine will become second nature. Follow these best step-by-step instructions, and you’ll soon be ready to create beautiful, seamless stitches on your vintage Singer sewing machine.
Happy sewing!
FAQs: How to Thread a Vintage Singer Sewing Machine
1. Why is threading a vintage Singer sewing machine different from modern machines?
Threading a vintage Singer sewing machine involves manually following specific pathways and steps unique to older models. Unlike modern machines, vintage Singers may lack automatic threading features, requiring more precision and attention to detail
2. What tools do I need to thread a vintage Singer sewing machine?

To thread a vintage Singer sewing machine, you’ll need:
- A spool of quality thread
- A wound bobbin
- The machine’s manual (if available) for model-specific guidance
3. How can I identify my vintage Singer sewing machine model for threading instructions?
Look for the model number on the machine’s base, serial plate, or instruction manual. Knowing the model is crucial for understanding how to thread a vintage Singer sewing machine, as the threading paths may vary.
4. What should I do if the thread keeps breaking while using my vintage Singer sewing machine?
Frequent thread breaking may indicate:
- Incorrect threading of the machine
- A damaged needle
- Poor-quality thread
- Tension that is set too tight
Recheck the threading pathway and tension settings to resolve the issue.
5. Can I use modern threads with my vintage Singer sewing machine?
Yes, but it’s essential to use high-quality thread designed for sewing machines. Poor-quality or overly thick threads can jam the machine or cause tension problems.
6. How do I thread the bobbin on a vintage Singer sewing machine?
To thread the bobbin:
- Place the bobbin in the bobbin case.
- Pull the thread through the slot and under the tension spring.
- Ensure the bobbin is inserted correctly for smooth operation.
This is a crucial step when learning how to thread a vintage Singer sewing machine.
7. What’s the purpose of the take-up lever in threading a vintage Singer sewing machine?
The take-up lever ensures that the thread feeds evenly during sewing. Missing this step in the threading process can lead to skipped stitches or tension issues.
8. Are there common threading mistakes to avoid with vintage Singer sewing machines?
Yes, common mistakes include:
- Skipping the tension assembly or take-up lever
- Using the wrong threading path for your model
- Forgetting to draw up the bobbin thread after threading the top thread
Double-checking each step can prevent these issues.
9. Can I find online tutorials on how to thread a vintage Singer sewing machine?
Absolutely! Many online resources, including videos and blogs, provide step-by-step instructions tailored to specific Singer models. Searching for your machine’s model number can yield the most accurate results.
10. How often should I clean my vintage Singer sewing machine to maintain smooth threading?
Regular maintenance is vital for ensuring the machine threads and stitches correctly. Clean your vintage Singer sewing machine after every few projects, focusing on the tension discs, bobbin area, and threading guides to remove dust and lint.
By addressing these frequently asked questions, you’ll gain a clearer understanding of how to thread a vintage Singer sewing machine and ensure a smooth sewing experience!
You may also be interested in this article How to Oil a Singer Sewing Machine: Best Guide For You
